Easy sugar cookies and Beagle sitting!

What a busy household I have this week! My two boys are home from school on spring break (they had a winter break in February and a spring break this week -- cuckoo, if you ask me). One of our friends went to New York City for the break, so we are taking care of their Beagle, Brady. Charlie just loves having a friend here! I love everything about having the two dogs, except for the barking. They both can get each other going over any neighbor coming or going, a dog being walked in front of our house, and any activity in the woods across the street. Between the two dogs and the two boys, it can be pretty loud around here!

My 11-year old loves to bake, so he has used some of his free time to whip up a couple of batches of his current favorite cookie recipe -- easy sugar cookies. These cookies are not only easy, they are delicious -- very chewy and buttery. The dogs were outside while he was baking, and they must have gotten a whiff of the cookies. Boy, did those dogs want a taste.

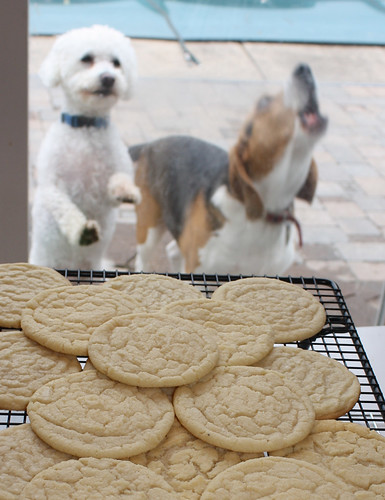
First, they tried staring and looking cute.


Danny cookies charlie barking
Next, Charlie tried barking. No luck!


Danny cookies Brady barking
Then Brady tried barking. No luck either -- we wanted the cookies all for ourselves!


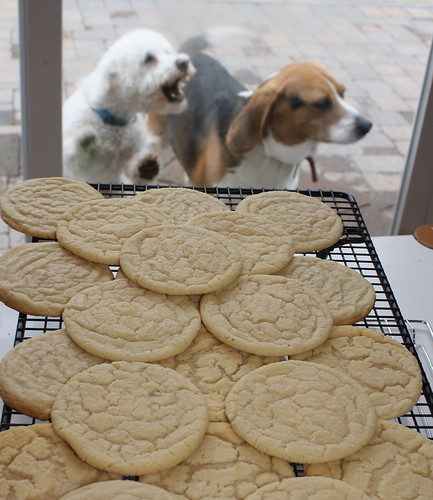
Next, Charlie took a nap while Brady kept watch out the window.


Finally they both went to sleep. Aren't they cute? Still thinking cookies? Here's the recipe.


Easy Sugar Cookies
Adapted from a recipe on Allrecipes.com

2 3/4 cups all-purpose flour
1 teaspoon baking soda
1/2 teaspoon baking powder
1 cup butter, softened (he prefers using salted butter for this recipe)
1 1/2 cups white sugar
1 egg
1 teaspoon vanilla extract

Preheat oven to 375 degrees F (190 degrees C). In a small bowl, stir together flour, baking soda, and baking powder. Set aside.

In a large bowl, cream together the butter and sugar until smooth. Beat in egg and vanilla. In two batches, blend in the dry ingredients. Use a medium size Pampered Chef scoop to drop mounds of dough onto ungreased cookie sheets.

Bake 11-13 minutes in the preheated oven. My son prefers that they be set but not turning color at all -- I like them when they are a little golden around the edges. Let stand on cookie sheet two minutes before removing to cool on wire racks.

Happy Earth Day (and a freebie)!

These are the new reusable bags from Wegmans. Aren't they cute? I have some of their original reusable bags, which are plain black with the Wegmans logo. I've been eying buying some of the the new cute ones (just 99 cents each), but truth be told, I am not in a good habit of using them. Either they are in the car and I forget to bring them in the store, or I use them, bring in the groceries, and the bags remain somewhere in the house (which is the case right now).

Well, you can get one of these cute bags -- FREE! On Saturday, April 25, from 11 AM - 3 PM, Wegmans will be showing off their products and programs that promote sustainability through reduce, reuse, and recycle efforts. If you bring a tightly filled bag of plastic bags to recycle, they'll give you a reusable bag free! (Limit one per household.)

I've got my bag of plastic bags ready to go! Maybe having a cuter reusable bag will make me remember to use them more often.

Easter dinner recipes

As I mentioned in my earlier post about Easter, I misplaced most of my usual Easter recipes so I tried a bunch of new recipes this year. Most were tasty -- good enough to share -- but none of them made me call off my search for my favorites. I served Baked Ham with Bourbon Glaze, which I liked but my husband didn't, because he doesn't like sweet sauces or glazes with meat. Grandma's Cheesy Potatoes are ubiquitous, I think, because Wegmans often seems to run out of the frozen hash brown potatoes. The Green Beans with Caramelized Onions was the best recipe of the bunch, but frankly I think caramelized onions are something you can put on just about anything and it will taste better. Oh, and I made a truly awful mustard sauce that looked and tasted something like paper mache paste. I didn't even put it on the table. Here are the recipes.

Baked Ham with Bourbon Glaze
Adapted slightly from The All-New Ultimate Southern Living Cookbook

1 cup honey
1/2 cup molasses
1/2 cup bourbon
1/4 cup orange juice
2 Tablespoons Dijon mustard
1 (6- to 8-pound) ham half

Microwave honey and molasses in a 1-quart glass dish at HIGH 1 minute. Whisk to bend. Whisk in bourbon, orange juice and mustard.

Remove skin and fat from ham; place ham in a lightly greased 13- by 9-inch pan. Make 1/4-inch-deep cuts in ham in a diamond pattern. Pour glaze over ham.

Bake on lower oven rack at 250 for 2 to 2 1/2 hours or until a meat thermometer inserted into the thickest portion registers 140, basting every 15 minutes with glaze.

Remove from pan, reserving drippings. Defat the drippings and serve with the ham. Yield: 12 servings

Grandma's Cheesy Potatoes
This was a recipe Grandma used to make, but I've seen lots of variations of this recipe. I've lightened these a bit from her original recipe ... also replaced chopped onion with dried onion flakes. They need to be cooked for about 90 minutes to get the potatoes soft, which is longer than the original directions.

2 Tablespoons butter, melted
1 Tablespoon dried onion flakes
1 can cream of chicken soup (I use the reduced fat kind)
1 pint sour cream (I use light)
Salt and pepper, to taste (about 1 teaspoon of each)
2 cups shredded cheddar cheese, divided
1 2-pound bag hash brown potatoes, thawed

Combine first six ingredients, reserving 1/2 cup cheese for the top. Mix in the hash browns.

Put in greased 9" by 13" Pyrex pan. Sprinkle top with reserved cheese.

Bake at 350 degrees for about 90 minutes.

Green Beans with Caramelized Onions
Adapted slightly from The All-New Ultimate Southern Living Cookbook
2 pounds fresh green beans
2 large sweet onions (such as Texas Sweet, Vidalia or Walla Walla)
3 Tablespoons butter or margarine, divided
3 Tablespoons light brown sugar
1 1/2 Tablespoons balsamic vinegar

Trim benas. Cook beans in boiling water to cover 5-12 minutes or until desired tenderness (remember they will cook a little longer with the onions). Drain and set aside, or cover and chill overnight, if desired.

Meanwhile cut onions in half, then cut into thin sliced.

Melt 1 Tablespoon butter in a large nonstick skillet over medium-high heat, and add onions. Cook 8-10 minutes (stir only if onions are really scorching).

Continue cooking onions, stirring often, 15 to 20 minutes or until golden (reduce heat if they are burning). Reduce heat to medium; stir in remaining 2 Tablespoons butter and brown sugar.

Add green beans and cook 5 minutes or until thoroughly heated. Add vinegar; toss to coat. Yield: 8 servings

Chocolate Covered Peanut Butter Eggs

I host Easter every year, and every year there seems to be some kind of a disaster. This year I faced a double whammy. First, I had a bad stomach bug early in the week, which shaved a couple of days off my preparation time. Second, and even worse, I couldn't find the recipes that have become my personal Easter favorites. I'm kicking myself for never posting my Easter recipes on this blog. I'm convinced the stack of recipe cards is stashed in a cookbook somewhere. Those two mini-disasters meant that this year's Easter dinner just wasn't up to par. I'll eventually post the recipes I made, but they just weren't my favorite.

The day did have one HUGE hit: homemade chocolate peanut butter eggs, a recipe from a cooking contest friend, Beth Royals. Beth and I were both in the Pillsbury Bake-off contest in 2004, but I really got to know her when she and I, as well as our sons, were in the AirBake Ultra Extreme Cookie Challenge together two years later. Her contest record eclipses mine, and since she gave the egg recipe rave reviews, I was confident it would be a hit.

The peanut butter filling came together quickly, and it was easy to handle as my son and I shaped it into three- to four-inch eggs (which are huge as candy eggs go). I refrigerated them overnight to set.

The dipping did not go as smoothly. I failed to notice that Beth had given specific instructions for dipping the eggs, and I just plunked them into the bowl of melted chocolate. Getting them into the chocolate was easy -- getting them out was another story. I used my usual candy dipping implement, a dinner fork, but the fork didn't support enough of the egg and the sides of the eggs chipped off into the melted chocolate. At this point a smart person may have checked the recipe to see if Beth had made any notes about dipping technique, but nooo, I have to figure these things out for myself. Next, I turned to a slotted spatula (of the pancake turner type). It worked better for getting the eggs out of the chocolate, and the chocolate dripped off nicely from between the slots, but then it was hard to get the eggs off the pancake turner! As you can see by the drips on the wax paper, it was a messy process.

The next step was decorating the eggs. Beth puts names on hers and decorates them with flowers. That had been my original intention, as you can see by the name on the egg in the bottom corner, but I didn't like the way it looked. Instead, I drizzled them with various colors of melting wafers, interspersed with chocolate. I probably went overboard with the drizzling.

I wrapped two plates for neighbors, and had planned to put one at each place on the table. At the last minute, though, I put them on a platter. When I served them, my sons and nephew just about pounced on them and grabbed one each. My sons managed to eat half of theirs, and wrapped up the rest to eat later. My nephew, however, downed just about the whole thing (his father took a few bites).

"You could put Reese's out of business with those things," my brother-in-law said. I can't believe my nephew didn't have a bad stomach ache from eating that!

My husband, mother-in-law and I divided one among us, because they slice neatly. The leftovers were sent home with my guests, and I kept a few. Even though my kids have plenty of Easter candy left in their baskets, they keep asking if they can have one of the peanut butter eggs. That's how good they are. We'll share the last one today.

When I was struggling through dipping the eggs, I didn't expect I'd want to make these again, but they just may become an Easter tradition. Next time, though, I'd probably make them a bit smaller, to make them easier to dip and less gluttonous to eat.

(These are on Tastespotting -- a wonderful place to look for recipes!)

Chocolate Covered Peanut Butter Eggs
Courtesy of Beth Royals (my notes in parentheses & italics)

1 1/2 pounds powdered sugar, divided
3 sticks (salted) butter, room temperature
1 16-ounce jar peanut butter (plus 1/4 cup) (I used an 18-ounce jar)
1 7-ounce jar marshmallow cream
2 pounds *dark chocolate disks (I used milk chocolate and would do it again)

Combine about a third of the powdered sugar and butter in large bowl of electric mixer. Mix until well combined. Add peanut butter and marshmallow cream then gradually add remaining powdered sugar. Shape into eggs about 3-4 inches long trying to keep the bottom side flat. Refrigerate on waxed paper-lined cookie sheet to set (about 8 hours).

Beth's dipping directions, and you would be smart to follow them: Melt chocolate then coat eggs. I dip the bottoms first, only about 1/4-inch deep then chill to firm. Then I set them on a wire rack over waxed paper and pour just enough chocolate over them to coat, spreading to cover with a small metal spatula. Once dry I decorate with pastel colored royal icing, piping names of children, teachers, whoever you are giving them to. Next, I surround the names with flowers. (I just drizzled various colors of candy melts and chocolate.)

Servings: Varies depending on size you make the eggs. (Mine made about a dozen.)

Overnight Cinnamon Rolls with Cream Cheese Glaze

I like serving nice breakfasts on holidays and special occasions (like this coming Easter Sunday), but to tell you the truth, I am not a high-energy person in the morning. I prefer easing into the day with a cup of black coffee (or two or three) and reading the paper before I do anything productive.

I love breakfast recipes in which the work is done the day before, so I can just pop it in the oven in the morning. When my son asked for cinnamon rolls for his birthday breakfast in January (yes, I'm that behind in posting), I looked for recipes for cinnamon rolls that could be done that way. I ended up combining recipes from two trusted sources -- Molly Wizenberg (of Orangette fame) and Alton Brown (of Food Network fame). Both recipes had elements I didn't like. Molly's called for kneading by hand -- I got a KitchenAid stand mixer to avoid doing that -- and it seemed skimpy on the glaze. Alton's had buttermilk, which I didn't have in the fridge, and called for four egg yolks, and I hate discarding four whites if I don't have to. (Yes, I know I could use the whites for various things but they always wind up in the trash.) So I combined what I liked about two recipes.

The rolls weren't hard to make -- just remember that the dough needs a couple of hours to rise, so don't get started at midnight (something I tend to do). And I loved that they were coming out of the oven a little over an hour after I woke up.

When the rolls came out of the oven, they were divine -- soft and tender and loaded with cinnamon flavor. They were perfection -- for about the first two hours. Then they started to dry out. By the next morning, they were pretty close to stale (although they were ok reheated in the microwave, as long as you ate them right out of the microwave).

I'm way behind on my Easter preparations, but if I decide to make these for Easter morning, I'll probably either freeze one of the pans of the baked rolls, unfrosted, or freeze the dough of one of the pans before baking. I'll let you know how that works out.

In the meantime, I'm sending this to Yeastspotting, a great blog event devoted to yeast breads or recipes made with bread. It was started at Wild Yeast, a fantastic blog devoted primarily to baking bread, and is hosted this week by Zorra's blog -- head over there to check out other great bread recipes!

Overnight Cinnamon Rolls with Cream Cheese Glaze

Rah Cha Chow Recipe (A combination of Molly Wizenberg's recipe on Epicurious and Alton Brown's recipe on Food Network)

Dough:
1 cup whole milk
3 tablespoons unsalted butter
3 1/2 cups (or more) unbleached all purpose flour, divided
1/2 cup sugar
1 large egg
2 1/4 teaspoons rapid-rise yeast (from 2 envelopes yeast) -- I used SAF instant yeast
1 teaspoon salt
Nonstick vegetable oil spray

Filling:
1 cup (packed) light brown sugar
2 tablespoons ground cinnamon
1/4 cup (1/2 stick) unsalted butter, melted

Glaze:
2 1/2 ounces cream cheese, softened
3 tablespoons milk
6 1/2 ounces powdered sugar, approximately 1 3/4 cups

Dough:

Combine milk and butter in microwave-safe cup or bowl. Microwave on high until butter melts and mixture is just warmed to 120°F to 130°F -- it will feel like the temperature of a nice warm bath or shower -- mine took 1 1/2 minutes using cold milk and butter. Pour into bowl of stand mixer fitted with paddle attachment. Add 1 1/2 cups flour, sugar, egg, yeast, and salt. Beat on low speed 3 minutes, stopping occasionally to scrape down sides of bowl. Switch to dough hook. Add 2 cups flour. Beat on low for about 10 minutes until flour is absorbed and dough is moist and just barely sticky, scraping down sides of bowl. If dough is very sticky, add more flour by tablespoonfuls -- but you are better off having the dough a little too sticky than adding too much flour. It will become less sticky after it rises. Form dough into ball.

Lightly oil large bowl with nonstick spray. Transfer dough to bowl, turning to coat. Cover bowl with plastic wrap, then kitchen towel. Let dough rise in warm draft-free area until doubled in volume, about 2 hours.

For filling:

Mix brown sugar and cinnamon in medium bowl.

Punch down dough. Transfer to floured work surface. Roll out to 15x11-inch rectangle. Brush much of the melted butter over dough, leaving 1/2-inch border. Sprinkle cinnamon sugar evenly over butter. Gently press the filling into the dough. Drizzle with the remaining butter. Beginning with the long edge nearest you, roll the dough into a tight cylinder. Firmly pinch the seam to seal and roll the cylinder seam side down. Very gently squeeze the cylinder to create even thickness. With seam side down, cut dough crosswise with thin sharp knife into 18 equal slices (each about 3/4 inch wide).

Spray two 9-inch square glass baking dishes with nonstick spray. Divide rolls between baking dishes, arranging cut side up (there will be little space between rolls). Arrange rolls cut side down in the baking dish; cover tightly with plastic wrap and store in the refrigerator overnight or up to 16 hours.

Remove the rolls from the refrigerator and place in an oven that is turned off. Fill a shallow pan 2/3-full of boiling water and set on the rack below the rolls. Close the oven door and let the rolls rise until they look slightly puffy; approximately 30 minutes. Remove the rolls and the shallow pan of water from the oven.

Position rack in center of oven and preheat to 350 degrees F.

When the oven is ready, place the rolls on the middle rack and bake until golden brown, or until the internal temperature reaches 190 degrees F on an instant-read thermometer, approximately 30 minutes. (Molly said to remove from oven and invert immediately onto rack, then cool 10 minutes. Turn rolls right side up. I didn't do this but might do it next time.)

For glaze:

While the rolls are cooling slightly, make the icing by whisking the cream cheese in the bowl of a stand mixer until creamy. Add the milk and whisk until combined. Sift in the powdered sugar, and whisk until smooth. Spread over the rolls and serve immediately.