Peanut Butter Blossoms and Other Christmas Cookie Favorites

45 Dozen Christmas Cookies

Last week, a group of coworkers gathered in the barn at Wickham Farms to bake cookies. In five hours, we baked more than 45 dozen cookies, and had a blast in the process.

I had agreed to coordinate the recipes, and when I got to the barn, I realized I had forgotten the recipes I had printed out. Not to worry -- my blog is my handy dandy online recipe box! I used my easiest cut-out cookie recipe as well as the peanut butter balls in this post. But I hadn't posted the recipe for my youngest son's favorite Christmas cookies -- Peanut Butter Blossoms. I found them on the Hershey's website, but I like to have my recipes here as well. So here's the recipe, even though I admit it's one just about everyone already has. For more unusual recipes, take a look at the 12 Weeks of Christmas Cookies and Sweets blog event links below.

Peanut Butter Blossoms
From Hersheys.com (with minor adaptations)

Peanut Butter Blossom (aka Kiss Cookies)
48 Hershey’s Kisses chocolates
1/2 cup shortening
3/4 cup creamy peanut butter
1/3 cup granulated sugar
1/3 cup packed light brown sugar
1 egg
2 tablespoons milk
1 teaspoon vanilla extract
1-1/2 cups all-purpose flour
1 teaspoon baking soda
1/2 teaspoon salt
Additional granulated sugar

Heat oven to 375°F. Remove wrappers from chocolates.

Beat shortening and peanut butter in large bowl until well blended. Add 1/3 cup granulated sugar and brown sugar; beat until fluffy. Add egg, milk and vanilla; beat well. Stir together flour, baking soda and salt; gradually beat into peanut butter mixture.

Gently press those Kiss chocolates!
Shape dough into 1-inch balls. Roll in granulated sugar; place on ungreased cookie sheet.

Bake 8 to 10 minutes or until lightly browned. Remove from oven, then quickly but gently press a chocolate into center of each cookie; cookie will crack around edges. Remove from cookie sheet to wire rack. Cool completely.

About 4 dozen cookies.


12 Weeks of Christmas Cookies: A Magical Bar for all Seasons


Awhile back, I signed up to take part in a blogging event called "Twelve Weeks of Christmas Cookies & Sweets." It seemed like fun to share our favorite holiday recipes over the course of 12 weeks. Sometime in October, I sat down to write my first post for the series ... and I just couldn't finish it. I felt that I was like one of those stores who puts up Christmas decorations before Halloween. It was too soon for me.

So I'm just now finishing that post and participating in the Blog Hop. I hope to make 12 contributions, just not over 12 weeks. The first is The Magic Cookie Bar, or Seven Layer Bar, or Hello Dolly bar, depending on where you're from. I go for the magical title myself.

I know they're in just about every cook's arsenal, but with some imagination, you can make them creative and appropriate for any season:
- They are fairly flat when they are made as written (shown above). If you like a thicker bar, just use a smaller pan.
- I have a friend who uses food coloring to color her coconut to make her bars more festive. You could also use other flavored chips instead of the butterscotch chips.
- You can also use different kinds of nuts (I don't like leaving them out because the nuts help keep them from being cloyingly sweet).
- Another great variation is this banana cookie bar recipe, created by Anna at Cookie Madness. She used a chocolate shortbread crust and adds banana to the topping.


Magic Cookie Bars

1/2 cup butter
1 1/2 cups graham cracker crumbs (or try a different cookie crumb)
1 can (14 ounces) sweetened condensed milk
1 cup semisweet chocolate chips
1 cup butterscotch chips (or use different chips)
1 -2 cups sweetened flaked coconut
1 cup nuts -- I love whole walnuts but you can use pecans or another favorite nut

Preheat oven to 350°. Melt butter in a 13 x 9-inch baking pan. (If you like them thicker, try a 7 x 11 pan.) Sprinkle crumbs evenly over melted butter; pour sweetened condensed milk evenly over crumbs. Top evenly with remaining ingredients; press down firmly. Bake 25 to 30 minutes or until lightly browned. Cool magic cookie bars before cutting. My favorite way to eat them is refrigerated.

Aubergine Caviar (Michael Symon)

My Cooking Light Group recently had a dinner with the theme of cooking a dish from a favorite chef. I love that theme! I wanted to cook a Michael Symon recipe because the meal my son and I had at his Lola Bistro in Cleveland was outstanding. Plus, I like Symon's personality, and respect his choice of staying in the Cleveland area instead of heading to a bigger city.

The trouble is, very few of Symon's recipes are appropriate for a Cooking Light Group. I finally found one for Aubergine Caviar on the Food Network website. It doesn't seem like the food he's known for, but it fit the bill for the dinner. Plus, it incorporates a lot of the veggies that are in season now -- eggplant, tomatoes and peppers.

It turned out OK -- the flavor was pretty mild. To be honest, I prefer my own recipe for Melitzanosalata (Greek Eggplant Dip), which is ironic, since Symon is of Greek descent, as well as an Iron Chef. I suspect the dip tastes better when he makes it. 

Aubergine Caviar (Michael Symon)

Olive oil – enough to brush veggies with it
2 pounds eggplant
2 yellow peppers
2 tomatoes
1 onion, minced
2 cloves garlic, minced
2 tablespoons balsamic vinegar
1 tablespoon orange juice
1 tablespoons ground coriander
A drizzle of olive oil
1/3 cup yogurt
Salt and pepper, to taste
4 tablespoons flat leaf parsley

Preheat the oven to 350 degrees. Oil the eggplant, peppers and tomatoes. Place them on a baking sheet, season with salt and pepper and place them in the oven. Roast until soft, about 20 minutes. (These weren’t soft at this point so I increased temp to 400 degrees and baked another 10 minutes. In the future, I’d do them at 400). Peel eggplant, peppers and tomatoes.

Saute the garlic and onions in olive oil (season with salt and pepper) over medium-low heat until they are translucent and aromatic.

Put mixture in food processor and add garlic-onion mixture, vinegar, orange juice, coriander, olive oil, yogurt and salt and pepper. Fold in chopped parsley.

Season, to taste, with salt and pepper, and serve with pita wedges. (I brushed the pita wedges with olive oil and toasted thems).

Tomato, Mozzarella, and Basil Bruschetta


Someone has deemed it locavore month in Rochester, so here's a recipe that takes advantage of the season's wonderful tomatoes and basil, which came from my own garden. This recipe is only good when tomatoes are in season locally -- winter supermarket tomatoes just don't cut it.

This recipe is from Mario Batali, although my friend Melissa makes something almost identical. If you have a grill going, you can grill the bread. I usually just brush the breads with some olive oil and sprinkle with a little salt & pepper, then bake the breads at 400 degrees for about 5 minutes. Either way tastes great.

Tomato, Mozzarella, and Basil Bruschetta
Recipe adapted from Mario Batali Italian Grill 

1 pound ripe tomatoes, cut into ¼-inch dice
4 ounces fresh mozzarella, cut into ¼-inch dice
3 garlic cloves, thinly sliced (next time I'd blanch these to temper the raw garlic flavor)
1 teaspoon dried oregano, crumbled (I used fresh)
12 medium fresh basil leaves, cut into chiffonade (thin slivers)
1 teaspoon hot red pepper flakes
3 tablespoons extra-virgin olive oil
Kosher salt (or table salt)
Eight ¾-inch-thick slices Italian peasant bread (I used slices of Wegmans baguette)
Coarse sea salt

Serves 4

Preheat a gas grill or prepare a fire in a charcoal grill (or preheat oven to 400 degrees).

In a medium bowl, combine the tomatoes, mozzarella, garlic, oregano, basil, red pepper flakes, and oil and toss or stir gently to mix. Season lightly with salt and mix gently again. Taste and adjust seasonings if needed. Set aside.

Grill the bread until dark golden brown lines form on the first side, 1 to 2 minutes, then turn over and repeat on the second side. (Or brush bread with olive oil, salt & pepper and bake at 400 until light golden brown.)

Arrange the grilled bread on a platter, top with the tomato mixture, and sprinkle with coarse salt. Serve immediately.

Mixed Greens and Nectarine Salad with Walnut Oil Vinaigrette


This simple salad highlights the sweet, juicy nectarines that are so wonderful this time of year. I've made a few variations -- I've made it with peaches, added pecans, added goat cheese, added grilled chicken -- and it's great every time.

It calls for walnut oil, which is an ingredient that always elicits a guffaw from my husband, Tom. Here's why.

Shortly after my husband and I were married (almost 20 years ago), we invited another couple, Karin and Steve, over for dinner. They were the first "couple" friends we had made together, and we enjoyed spending time with them. I admired Karin's cooking, which seemed so much more sophisticated than mine. She never used things like canned cream-of-something soup or bottled salad dressings, both of which were integral items in my culinary repertoire. And she very rarely followed a recipe exactly -- a practice that was foreign to me.

For my menu, I turned to a wedding gift, The New Basics Cookbook -- a cookbook from the Silver Palate series. (I still use it regularly.) I prepared an autumn-themed dinner, and the salad was Pear and Blue Cheese Salad, which was served with a walnut oil vinaigrette.

I sent Tom to Wegmans with a long list of ingredients, and he returned home with most of the ingredients, but said that he asked a few different Wegmans employees where the walnut oil was, and they all  looked at him like he had two heads. After lots of searching, he concluded that walnut oil was nowhere to be found.

At that point, I was in no condition to change my menu and I, unlike Karin, followed each recipe to a tee. So I sent my poor new husband on a wild goose chase all over the Rochester area to find walnut oil. Hours later, he returned home with the prized walnut oil. He had found it at a gourmet food shop in Pittsford, Cook's World (it's still in the same location, and looks pretty much the same as it did then). I was shocked that the oil cost $12!

So we served the salad and Tom, of course, regaled them with the story of the hunt for the walnut oil. Karin laughed and said, "you could have just substituted olive oil." That truly had never occurred to me! Luckily, Karin and Steve loved the salad -- so much so that they served it at Christmastime that year (although I don't know whether she used walnut oil). Tom, on the other hand, took a few tentative bites and said, "I'm sorry, but these flavors just don't go together." To be honest, I was somewhere in the middle -- didn't love it, didn't hate it.

Almost 20 years later, Wegmans now carries walnut oil, so I use it in this recipe, with fond memories of the times we had with Karin and Steve.

Mixed Greens and Nectarine Salad (with some variations)
(Adapted from this Cooking Light recipe)

4 cups salad greens (I used green leaf and red leaf lettuce)
2 cups thinly sliced nectarines (about 2)

Walnut Oil Vinaigrette Ingredients:
1/4 cup white wine vinegar
2 tablespoons minced shallots
2 tablespoons walnut oil
2 tablespoons honey
1 tablespoon fresh lemon juice
1/2 teaspoon salt
1/4 teaspoon freshly ground black pepper

Combine all vinaigrette ingredients, stirring with a whisk. Store in refrigerator for up to 1 week. Yield: 2/3 cup (serving size: about 1 tablespoon)

Place greens and nectarines in a large bowl. Drizzle sparingly with Walnut Oil Vinaigrette; toss gently to coat. You will not need very much vinaigrette.

Yield: 4 servings (serving size: about 1 cup)

Variations I've tried:
- use peaches instead of nectarines
- Add nuts, goat cheese and/or

Delicious Salads to Beat the Heat


With the heat we've been having, who wants to cook? I sure don't, but I love all the fresh produce that's in season right now. That's why it was so perfect that our most recent Cooking Light Group dinner had a "beat the heat" theme. Three of the dishes were refreshing summer salads that I truly enjoyed.

The main dish grilled chicken salad combined grilled chicken, sweet nectarines (peaches would be good too), goat cheese and pecans. The next time we grill chicken, I'll make extra so that we can have this salad the next day. Nancy, our hostess, served it on a gorgeous square platter, which made it even more appetizing. Jackie's colorful crunchy corn medley was downright addictive -- I gobbled it up for lunch the next morning. And Chrissy's celery and feta cheese salad benefited from using very good ingredients, including an excellent Greek feta cheese.

Grilled Chicken and Nectarine Salad
Adapted from Sunset Magazine

2/3 cup pecan halves
2 quarts salad greens (8 oz.), rinsed and crisped
1/4 cup vegetable oil
1/4 cup walnut oil (or more vegetable oil; see
1/4 cup white wine vinegar
4 boned chicken breast halves with skin (2 lb. total), rinsed, patted dry, and fat trimmed
Salt and pepper
2 firm-ripe nectarines (12 oz. total), rinsed, pitted, and thinly sliced
5 ounces fresh chèvre (goat cheese), crumbled

Preheat oven to 350°. Spread pecans in a baking pan and bake until golden under skins, about 10 minutes. Let cool, then coarsely chop.

In a small bowl, stir vegetable oil, walnut oil, and vinegar to blend. Set aside.

Sprinkle chicken with salt and pepper. Lay on a lightly oiled barbecue grill over a solid bed of medium-hot coals or medium-high heat on a gas grill (you can hold your hand at grill level only 3 to 4 seconds); close lid on gas grill. Cook chicken, turning occasionally, until meat is no longer pink in center of thickest part (cut to test), about 15 minutes total. Transfer chicken to a cutting board. Remove skin if desired.

Mound salad greens on a large platter. Slice chicken across the grain 1/2 inch thick; arrange over greens. Tuck nectarine around chicken. Scatter goat cheese and pecans over the top. Stir dressing; pour over salads. Add salt and pepper to taste.

Crunchy Corn Medley
Of course you can substitute fresh for canned, but the canned sure is easy! She reduced the amount of salad dressing from the published recipe in a magazine.

2 cups frozen peas, thawed
1 can (15-1/4 oz.) yellow corn, drained
1 can (15-1/4 oz.) white or shoepeg corn, drained
1 can (8 oz) water chestnuts, drained and chopped
1 jar (4 oz) pimientos, drained and diced
8 green onions, thinly sliced
2 celery ribs, chopped
1 medium green bell pepper, chopped

Dressing:
1/4 cup vinegar
1/4 cup sugar
1/8 cup vegetable oil
1/2 tsp. salt
1/8 tsp. ground pepper

Mix altogether. Chill for at least 3 hours. Stir before serving.

Celery Salad with Feta and Mint

Combine 6 large stalks of celery, cut into 1/2 inch slices, and 1/4 small red onion, thinly sliced. Add 2 tbsp each extra virgin olive oil, lemon zest, lemon juice. season with coarse salt and ground pepper. sprinkle with 1/3 cup crumbled feta and 3 tbsp thinly sliced fresh mint leaves.

serves 4 102 cals, 9 g fat, 2 g protein, 3 g carbs, 1 g fiber for those of you who count these things

I'm at Frosting for the Cause Today


This is my son's Easy Crumb Cake - so delicious. Read all about it at Frosting for the Cause today!

Creamsicle Cupcakes

A few weeks ago, as I was preparing for my good friend's 50th birthday party, my Mom and I were chatting about the party plans. I mentioned that I had spent a few hours making three different kinds of cupcakes for dessert.

"I don't know why you spent so much time on dessert," she said. "Nobody ever eats dessert."

My Mom and I clearly travel in different social circles.

These Creamsicle cupcakes in particular were a hit. One guest took a cupcake home (with my blessing) and hid it from her husband. I got emails the day after the party asking for the recipe. So here it is -- my own creation. It's my favorite yellow cupcake recipe (from Cooks Illustrated), with a cream filling and orange icing. The orange icing is something I created by adding ingredients until I got a taste to my liking. I'm sure you could achieve a similar result with fewer ingredients, but that's what I did.

And, for the record, I'll continue to spend time making desserts for get-togethers. Hey, if people don't eat them, at least I can enjoy the leftovers from my favorite part of the meal.

CREAMSICLE CUPCAKES

Makes 24 cupcakes

One-Bowl Yellow Cupcakes (adapted from Cooks Illustrated)

3 cups (13 oz/375 grams) all purpose flour
2 cups (14 oz/400 grams) granulated white sugar
3 teaspoons baking powder
1 teaspoon salt
1 cup (2 sticks) unsalted butter, room temperature (cut into pieces)
3 large eggs, room temperature
2 large egg yolks, room temperature
1 Tablespoon vanilla extract
1 cup sour cream, room temperature

Preheat oven to 350 degrees F (177 degrees C) and lightly butter or line 24 muffin cups with paper liners.

In the bowl of your electric mixer, beat the flour, sugar, baking powder, and salt on low speed to combine. Add the butter, eggs, egg yolks, vanilla extract, and sour cream. Beat at medium speed until the batter is smooth and satiny, about 30 seconds. Scrape down the sides of the bowl. If necessary, stir the batter with a rubber spatula until the flour is fully incorporated.

Evenly fill the muffin cups with the batter (I used the largest Pampered Chef scoop) and bake for about 20 - 25 minutes or until pale gold and a toothpick inserted into a cupcake comes out clean. Remove from oven and place on a wire rack to cool.

To assemble the Creamsicle cupcakes, I used the small end of a melon baller to scoop a hole in the cupcakes, then piped cream filling in the hole. Then I frosted with the orange frosting.

Cream Filling 
Fills 24+ cupcakes

2 tsp very hot water
1/4 tsp salt
1 (7 oz) jar marshmallow cream
1/2 cup shortening
1/3 cup powdered sugar
1/2 tsp vanilla

Dissolve the salt in the hot water and allow to cool. Whip the marshmallow cream, shortening, powdered sugar, and vanilla until it begins to get fluffy. Add the salty water and whip well. You will have some filling left over after filling the cupcakes. It's great as a fruit dip or a dip for cinnamon graham cracker sticks.


Orange Frosting
(Rah Cha Chow recipe)
Frosts 24 cupcakes

1 cup butter, room temperature
4 cups (500 grams) powdered sugar
Pinch of salt
1 teaspoon vanilla extract
2-3 teaspoons orange extract (I used about 3)
1/2 teaspoon lemon extract
2 Tablespoons orange juice
2 teaspoons lemon juice
Yellow and red food coloring (to make an orange colored frosting)

In the bowl of an electric mixer, beat the butter at medium-high speed until creamy. Add the rest of the ingredients and beat until combined. You may want to start with 2 teaspoons orange extract and then taste – add more if you think it needs it. Also add yellow and red food coloring until it’s the color you like.

See more sweets in:

Chocolate Peanut Butter Cupcakes

Picture this: it's my friend's 50th birthday party, held in my back yard around the in-ground pool. It's a beautiful evening, with good music and fun people. We've had a nice dinner and I bring out platters of cupcakes. The guests gather round and sing an enthusiastic chorus of  "Happy Birthday." To everyone's amusement, the balmy breeze keeps blowing out the candle for the guest of honor. Amid oohs and ahhs, the guests eagerly reach to snatch a cupcake and ...

"WAIT! I forgot to take pictures of the cupcakes!"

Everyone freezes as I snap a quick shot of my cupcakes. Welcome to a party thrown by a food blogger.

In the end, the picture above was the only picture I got of some of my cupcakes. Guess I won't be submitting this post to Tastespotting.

So on to the Chocolate Peanut Butter cupcakes in the foreground. They were inspired by my recent visit to local cupcake shop, Sugar Mountain Bake Shoppe. I loved the way their chocolate peanut butter cupcakes looked but thought the peanut butter frosting and filling overwhelmed the flavor of the chocolate cupcake. My version: my favorite chocolate cupcake recipe (which I got from the awesome Julie) topped with a generous amount of peanut butter buttercream. No filling.

Well, guess what?

The peanut butter frosting, which was divine, still overwhelmed the chocolate flavor of the cupcake. I was surprised because those cupcakes were really chocolatey. Next time I may devise a chocolate filling to really bring out the chocolate flavor.

All in all, the party goers were very happy with them. I even caught one person licking the wrapper. But the party favorite will come next.

Chocolate Peanut Butter Cupcakes
Makes 36 cupcakes

1 1/2 cups hot strong coffee
1/3 cup bittersweet chocolate chips
3 large eggs
3/4 cup canola oil
3 cups sugar
1 1/2 cups buttermilk
1 teaspoon vanilla extract
2 1/2 (313 grams) cups flour
1 ½ (138 grams) cups cocoa powder
2 teaspoons baking soda
3/4 teaspoon baking powder
1 teaspoon salt
Peanut Butter Buttercream, below
Mini peanut butter cups, cut in half.

Preheat the oven to 350F degrees. Line cupcake cups with paper liners.

Mix the hot coffee with the chopped chocolate, stirring occasionally until the mixture is smooth.

In the bowl of an electric mixer fitted with the paddle attachment, beat the eggs until they are slightly thickened, about 3 minutes. Slowly add the canola oil, and mix at medium speed for 1 minute. Gradually add the sugar, mixing until well combined. Slowly add the buttermilk, coffee mixture and vanilla, and mix until blended.

In a large bowl, sift together the flour, cocoa powder, baking soda, baking powder, and salt. Add the dry ingredients to the batter in three additions on low speed, stopping to scrape down the sides of the bowl as necessary. The batter will be liquidy.

Divide the batter among the prepared pans and bake until a toothpick inserted into the center emerges clean, 18-22 minutes, until a toothpick inserted into the center emerges clean.

When completely cooled, frost with peanut butter buttercream (for 36 cupcakes you'll need to multiply the recipe by 1 1/2). I used a Wilton 6B decorating tip to pipe on the frosting. Garnish with a half of a mini peanut butter cup.

Peanut Butter Buttercream
Frosts about 24 cupcakes

1 cup (2 sticks) salted butter, room temperature
2 tsp vanilla
1 cup creamy peanut butter
5 cups (250 grams) powdered sugar
3 Tablespoons milk

Beat butter and vanilla with an electric mixer until light and fluffy. Add peanut butter and mix until combined. Add powdered sugar in one cup increments. Add milk and beat until fluffy.

Carrot Cupcakes with Cream Cheese Icing

Last weekend, I hosted a 50th birthday party for a close friend. Before the party, I asked her if she had any special requests (the party wasn't a surprise, which made it much less stressful for me). Her only request was  cupcakes for dessert. Great! I love making cupcakes.

I served three flavors, which I'll cover in three different blog posts. First up: Carrot Cupcakes with Cream Cheese Frosting. I originally found the recipe on a food blog, but then I spotted the same cupcake recipe in a past issue of Cooks Illustrated. I was missing one of the spices called for in the recipe, so I substituted pumpkin pie spice -- it contained all of the spices listed in the recipe.

In the end, the cupcakes were good but nothing I'd swoon over. My guess is that Cooks Illustrated was going for a recipe that focused on the carrots, but I'd prefer more going on -- more spices and maybe some coconut and/or walnuts. The cream cheese frosting was my tried and true.

Some details: I frosted the cupcakes using a Wilton 6B decorating tip and a large coupler. I got the cute cupcake liners from this online Esty shop. The liners were said to be greaseproof, but maybe 1 1/2 cups of oil was too much for even greaseproof liners.

Next up will be the cupcakes that were the real hit of the party!

Carrot Cake Cupcakes with Cream Cheese Frosting
Makes 24 cupcakes

2 1/2 cups all-purpose flour
1 1/4 teaspoons baking powder
1 teaspoon baking soda
1 teaspoon cinnamon
1 1/2 teaspoons pumpkin pie spice (I'd use more spice next time)
1/2 teaspoon salt
1 lb. (6-7 medium) carrots, peeled
1 1/2 cups granulated sugar
1/2 cup packed light brown sugar
4 large eggs
1 1/2 cups canola, safflower or vegetable oil
(I'd also add coconut and/or chopped walnuts next time.)

Preheat oven to 350 degrees F. Line muffin pans with 24 baking cup liners.

In a medium bowl, whisk together the flour, baking powder, baking soda, spices and salt; set aside.
In a food processor fitted with a shredding disk, shred the carrots. Dump the carrots on top of the bowl with the dry ingredients and set aside. Wipe out the bowl of the food processor and fit with the metal blade.

Process the sugars and eggs until frothy and combined, about 20 seconds. With the machine running, add the oil in a steady stream through the feed tube. Continue to process until the mixture is light in color and combined, about 20 more seconds. Transfer the mixture to a large mixing bowl and stir in the carrots and dry ingredients until incorporated and no streaks of flour remain.

Divide the batter evenly among muffin pan cups. Bake 20 to 24 minutes or until toothpick inserted into center of cupcakes comes out clean. Cool cupcakes in muffin pan on wire rack for 5 minutes. Carefully lift each cupcake from muffin pan and set on wire rack. Cool to room temperature. Frost with cream cheese frosting, below.

Cream Cheese Frosting
Frosts about 24 cupcakes

1 8-ounce package of regular cream cheese, cold
1/2 cup (1 stick) butter, softened
1 teaspoon vanilla
2 cups (250 grams) powdered sugar

Blend together cream cheese and butter. With mixer on low speed, add the vanilla. Gradually add the powdered sugar until completely incorporated.

Cupcakes from Sugar Mountain Bake Shoppe

I had two wishes for Mother's Day: a new garage door opener (I'm nothing if not practical) and to try the cupcakes at Sugar Mountain Bake Shoppe. So on the Saturday before Mother's Day, while my husband and 16-year-old son worked on the garage door, my younger son and I headed to the trendy Park Avenue area to pick out cupcakes.


Oh, the place was charming! The building houses two businesses -- a Victorian tea room during the day, and then it turns into Sugar Mountain Bake Shoppe at 5 p.m. It's unusual for a bakery to open at 5 p.m., but I can see why it could work in the Park Avenue area, which is home to lots of young adults. I'll bet they pick up cupcakes on their way home from work, or stop in for coffee and cupcakes with friends. (They also serve food but I didn't pay much attention to the menu.)


The building has small rooms. Some are decorated in a Victorian style and some have a more current look. There's also a cute front porch -- I'd love to go there with friends.

They bake a lot of different flavors -- their website says 85 -- and different ones are on display each day. Or, you can order a dozen or more of your favorites with 24 hours notice. Each flavor was frosted differently and every one was gorgeous. It was tough to decide which eight to choose (we picked two for each of us -- one for Saturday and one for Sunday). Here's what we eventually selected:

Devil’s Twist : Dark chocolate cake with a white cream filling, dipped in chocolate ganache -- it looked like a Hostess cupcake.
Cookies and Cream: Dark chocolate cake with a chocolate cookie crust filled with white cream, topped with white chocolate buttercream and chunks of crushed chocolate cookies. My 13-year-old son devoured it the moment we got home on Saturday. I barely had time to snap this picture..
Cappuccino: Chocolate espresso cake filled with mocha ganache, topped with coffee buttercream. My 16-year-old son gave it a thumbs-up.
White Russian: Vanilla cake baked with kahlua and vodka, filled with kahlua chocolate ganache, topped with mocha buttercream. This was my favorite -- my husband's, too.
Chocolate Peanut Butter: Dark chocolate cake with peanut butter cream filling, topped with peanut butter buttercream. I thought the peanut butter filling and frosting obliterated the flavor of the chocolate cake.


What I didn't love:
- The cakes. They were light and a bit crumbly. My personal preference is a denser, moist cake. And I felt that the chocolate flavors could have had a more pronounced chocolate flavor.
- If I'm really being nitpicky, the cakes had "muffin tops." While I like them on muffins, I thought they made the cupcakes a little awkward to eat. But that's truly nitpicking.

What I loved: 
- The way they looked. You eat with your eyes first, and these were artfully done.

- All of the fillings and frostings. They were light and fluffy, not as sweet and heavy as typical bakery buttercreams.

Sugar Mountain Bake Shoppe set a benchmark for my upcoming cupcake baking projects -- I'm going to give more thought to how I decorate various flavors. I'll also be sure to go back with a friend and enjoy a cupcake on their porch in the summer.

Sugar Mountain Bake Shoppe on Urbanspoon

Banana Whoopie Pies with Cream Cheese Frosting


I had to make a dessert for a church pot luck dinner, and as usual I had a few verging-on-overripe bananas on the counter. What to make with those bananas? I was banana cupcaked out, and banana bread wasn't desserty enough, so I searched the Web for some ideas. The recipes that caught my eye: Banana Whoopie Pies.

Mmmm ... they sounded so good. But Banana Whoopie Pies for a church function? Wouldn't that sound a little risque?

I had never made whoopie pies before, or even tasted them, but they sounded so good that I decided to risk it.

Ohhh ... they turned out sooo good. Two cakey cookies that tasted like banana bread, sandwiched together with a generous dollop of fluffy, sweet, tangy cream cheese frosting. At the church dinner, I heard no complaints. Just a few "mmm's" and "oohs." I'll be making whoopie pies again for sure.

Banana Whoopie Pies with Cream Cheese Frosting
Cookies adapted from Taste of Home; filling from Martha Stewart

1/2 cup (1 stick) butter, softened
1/2 cup sugar
1/2 cup packed brown sugar
1 egg
1 teaspoon vanilla extract
1/2 cup mashed ripe banana (1 large or 1 1/2 medium bananas)
1/2 cup buttermilk
2 cups (280 grams) all-purpose flour
1/2 teaspoon salt
1/2 teaspoon baking powder
1/2 teaspoon baking soda

Filling (from a Martha Stewart recipe -- you'll have some left over):
3 cups confectioners' sugar
1/2 cup (1 stick) unsalted butter, softened
8 ounces cream cheese, softened
1 teaspoon pure vanilla extract
Pinch of salt

In a large bowl, cream butter and sugars until light and fluffy. Beat in egg and vanilla. In a small bowl, combine banana and buttermilk. In a third bowl, combine the flour, salt, baking powder and baking soda; gradually add to creamed mixture alternately with banana mixture.

Drop by tablespoonfuls two inches apart onto parchment paper-lined baking sheets. (At this size, you will make about 50 cookies.) Bake at 350° for 12-15 minutes or until set. Cool for 2 minutes before removing from pans to wire racks to cool completely.

For filling, in a large bowl, beat the cream cheese, and butter until fluffy. Beat in confectioners’ sugar, vanilla and salt until smooth. Use a pastry bag with a large star top to pipe a generous dollop of filling on the bottoms of half of the cookies. Top with remaining cookies and press together gently. Refrigerate for at least an hour before serving; store in the refrigerator.

Makes about 25 cookie sandwiches.

Orange Kissed Cheesecake Cupcakes with Strawberries

My thoughtful mother-in-law is always telling me not to "fuss" when I'm planning a family gathering. Since I enjoy what she terms "fussing" -- making a nice meal and dessert -- I often don't heed her advice. But last week, when we celebrated her birthday, my hectic schedule made me give in. We called out for pizza and wings ... but I did manage to make a reasonably nice dessert. Since she likes cheesecake, I made these cheesecake cupcakes, which I adapted from a recipe from Family Circle magazine. I was happy with the way they turned otu -- they had a subtle orange flavor and were just a tad firmer than I usually prefer for cheesecake.

The little cheesecakes form a dome on top as they bake, just like regular cake cupcakes, and then sink down as they cool. Don't make the mistake I did, and put too many graham cracker crumbs in the bottom of the cupcake liner. When I went to add the topping, there just wasn't room for it, so a fair amount of it spilled onto the outside of the cupcake liners. (That's why my photos show the opened cupcakes.) If you like a thicker crust, or just want to make sure your cupcakes look tidy, you may want to make a 13th cupcake or a few mini cupcakes. (Note: a friend made these after my original post. She made a few more than 12 and found them to be too small. Don't make this into more than 13 cupcakes. She used raspberry jam and raspberries and liked the flavor.)

My mother-in-law enjoyed the cupcakes, and also mentioned that she appreciated the portion control (as did I). They'd also be a good dessert to have for Easter. Speaking of which ... I won't be posting again until after Easter, so I'd like to wish my friends, family and readers who celebrate Easter a joyful day!

Orange-Kissed Cheesecake Cupcakes with Strawberries
Rah Cha Chow recipe

12 graham cracker squares, crushed
8 ounces cream cheese, softened
1 cup sugar
2 eggs
1/2 cup sour cream
2 tablespoons orange juice
1 teaspoon orange zest
1/2 teaspoon vanilla extract
1/4 cup all-purpose flour
Pinch of salt
Foil cupcake liners

Topping/garnish:
1/2 cup sour cream
2 tablespoons strawberry jam (could use raspberry instead)
12 large strawberries, for garnish (could use raspberry instead)

Heat oven to 325 degrees. Line 12-13 muffin pan cups (or 12 muffin cups and a few minis) with foil cupcake liners. (Yes, you really need them to be foil -- but there are some cute and colorful foil liners out there.) Place 1 scant tablespoon of graham cracker crumbs in each -- just enough to coat the bottom.

Beat cream cheese and sugar until smooth. Add eggs and beat until blended. (Be sure to keep scraping the bowl throughout the mixing process to keep the mixture smooth.) Beat in sour cream, juice, zest and vanilla. On low speed, beat in flour and salt.

Spoon about 1/4 cup batter in each cup (I use an ice cream scoop). Bake at 325 for 35 minutes.

While the cupcakes are baking, stir together the sour cream and jam. After 25 minutes, spread about 2 teaspoons of the sour cream mixture on top of each cupcake and bake for an additional 5 minutes.

Remove from oven and cool in pan on wire rack for 30 minutes. Remove cupcakes to rack to cool completely.

Slice strawberries without cutting all the way through the stem end (see picture). Fan out strawberries and place on top of cupcakes.

Roasted Garlic Bread


This bread, which I served with lasagna for my son's 16th birthday, is absolutely divine. As usual with Paula Deen's recipes, it had an obscene amount of butter, which I cut back by a fourth, and it was still decadent and delicious. It's definitely a repeater recipe, but to avoid a heart attack it's for special occasions only!

Roasted Garlic Bread
Adapted from this Paula Deen recipe

1 head garlic, unpeeled
1 tablespoon olive oil
1 1/2 sticks butter, softened

1/2 teaspoon ground black pepper
1/2 teaspoon salt
1 loaf Italian bread, split horizontally

Preheat oven to 425 degrees F. (If you have a toaster oven and aren't cooking anything else at the same time, use that.)

Cut top off garlic head. Place garlic on a piece of aluminum foil; drizzle with olive oil. Fold edges together to seal. Bake 30 - 40 minutes. (To see if it's done, squeeze the sides while holding a kitchen towel, The garlic should give easily and feel soft). Cool.

Squeeze cooked garlic into a medium bowl. Garlic will be soft and sticky. Add butter, salt and pepper, stirring to combine.Spread cut halves of bread evenly with garlic butter mixture. Broil 5 1/2 inches from heat, with oven door partially opened, for 2 to 3 minutes, or until butter melts and bread is toasted. Cut into slices to serve.

Searching for "My" Recipe for Lasagna

My older son recently turned 16, and I'm starting to envision a time where he no longer lives at home. He'll decide for himself how much time he'd like to spend with his Mom -- and since I love the kid, I'd like to see him choose to spend some time with me. I figure that one way of ensuring this is by having recipes that I make the best (at least in his eyes). A meal I continue to tinker with is one of his favorites -- lasagna and garlic bread.

I've made both fairly often and I usually cook them without a recipe. Because of this, they come out different every time, and very rarely a "wow.' The lasagna has a tendency to be dry and not flavorful enough, and the garlic bread ranges from not enough garlic to too much.

My most recent attempt at the meal was from Paula Deen -- not because I think she's the greatest Italian cooking, but because her recipe is along the lines of how I usually make these dishes. In her lasagna, she uses  a combination of ground beef and Italian sausage, which is what I usually do. I substituted 1/2 pound of turkey breast for ground beef in an attempt to lighten the dish a bit, which didn't do much to help the flavor or texture. She uses cottage cheese, which I changed to ricotta. She called for oven-ready noodles, but I use regular. The lasagna was good -- my son and husband ate quite a bit -- but wasn't exactly what I'd want my son to call "Mom's Lasagna."  The meat overwhelmed the dish and made it really heavy. It's a good starting point, though. Next time I'll try it with less of the meat and see how that goes.

Next post: Paula's DIVINE garlic bread.

Meaty Lasagna
Adapted from this Paula Deen recipe

1 pounds 90-95% lean ground beef
1/2 pound ground turkey (or you can use a total of 1 1/2 pounds ground beef)
1 pound ground Italian sausage
2 cloves garlic, minced
1 1/2 teaspoons Penzey's pizza spice (or you could use oregano)
1 teaspoon ground basil
1/4 teaspoon salt
1/4 teaspoon pepper
1 (14.5-ounce) can diced tomatoes with basil, garlic, and oregano
2 (15-ounce) cans tomato sauce
1 (6-ounce) can tomato paste
1 1/2 cups Ricotta cheese (Paula's uses small curd cottage cheese)
5 ounces grated Parmigianno-Reggiano
2 tablespoons freshly chopped parsley leaves
2 large eggs, lightly beaten
9 lasagna noodles, boiled to al dente
2 (8-ounce) packages shredded mozzarella

Preheat oven to 350 degrees F.

In a large saucepan, combine ground chuck, sausage onion and garlic. Cook over medium heat until meat is browned and crumbled; drain.

Return meat to pan and add oregano, basil, salt and pepper. Add tomatoes, tomato sauce and paste. Bring to a boil, reduce heat and simmer 30 to 45 minutes.

In a small bowl, combine Ricotta, Parmesan, parsley, and eggs.

Spoon 1/4 of sauce into bottom of a 13 by 9 by 2-inch baking pan. Place 3 uncooked lasagna noodles on top of sauce. Do not overlap noodles. Spread 1/3 of the Ricotta cheese mixture over noodles, top with 1/4 of sauce and 1/3 mozzarella cheese. Repeat layers, ending with sauce, reserving 1/3 of mozzarella cheese.

Bake 45 minutes. Top with remaining cheese and bake 15 minutes or until hot and bubbly. Let rest 10 minutes before serving.

Ultimate Chocolate Cupcakes


Last week, one of my blog posts noted that the chocolate cupcakes I made weren't quite up to my expections. Within minutes, cooking contest buddy, Julie, pointed me to her favorite chocolate cupcake recipe. Since she's a contest winner, food blogger and granola goddess, I had no doubt they'd be delicious. I made them for my son's cast party, and boy did they live up to my expectations. They were tender, moist and very chocolatey. Plus, they made 30+ cupcakes, which was perfect for feeding a crowd of high school performers. Definitely a keeper recipe -- I'll be making this one again. Thanks, Julie!

Julie’s Chocolate Cupcakes - Large Batch
(Adapted from Julie's recipe.)
Makes about 36 cupcakes. To make as a cake, check out Julie's blog!

1 1/2 cups hot strong coffee
1/3 cup bittersweet chocolate chips
3 large eggs
3/4 cup (600 grams) canola oil
3 cups sugar
1 1/2 cups buttermilk
1 teaspoon vanilla extract
2 1/2 (313 grams) cups flour
1 ½ (138 grams) cups good-quality cocoa powder
2 teaspoons baking soda
3/4 teaspoon baking powder
1 teaspoon salt

Preheat the oven to 350F degrees. Line cupcake cups with paper liners.

Mix the hot coffee with the chopped chocolate, stirring occasionally until the mixture is smooth.
In the bowl of an electric mixer fitted with the paddle attachment, beat the eggs until they are slightly thickened, about 3 minutes. Slowly add the canola oil, and mix at medium speed for 1 minute. Gradually add the sugar, mixing until well combined. Slowly add the buttermilk, coffee mixture, and vanilla, and mix until blended.

In a large bowl, sift together the flour, cocoa powder, baking soda, baking powder, and salt. Add the dry ingredients to the batter in three additions on low speed, stopping to scrape down the sides of the bowl as necessary. The batter will be liquidy -- don't worry!

Divide the batter among the prepared pans and bake until a toothpick inserted into the center emerges clean, 18-20 minutes, until a toothpick inserted into the center emerges clean. (For me, mini cupcakes took 20 minutes; regular took closer to 22 minutes, but I think my oven is slow.) Frost when completely cooled.


Chocolate Ganache Frosting
Adapted from Cupcake Bakeshop by Chockyli

9 ounces chocolate chips (I used semisweet -- I might use a mixture of milk & semisweet next time)
1 cup heavy cream
1 teaspoon vanilla
1 tablespoon butter, room temperature
2 cups (250 grams) powdered sugar

Put chocolate chips in a heatproof bowl (I used the bowl of my electric mixer). Heat cream until bubbles form around the edge of the pan, then pour cream over the chocolate. Let sit for one minute, then stir until combined. Add butter and vanilla and stir until combined. Let cool for 10 minutes.

Dump powdered sugar into the mixture (you're supposed to sift it but I never do). Beat until combined. Continue to beat with an electric mixer until lighter in color and creamy. I used a pastry bag with a large star tip to ice the cupcakes.

Banana Cupcakes, Three Frostings


Boy, did I make a lot of cupcakes during the past week! I made seven dozen for a late night of rehearsals of my son's high school play, "Once Upon a Mattress." A few days later, I made another four dozen for the cast party. It felt good when one of the leads stopped me at the cast party to tell me how much he enjoyed my cupcakes -- these banana cupcakes in particular. When he makes it big, I can say he liked my cupcakes.

I've made these banana cupcakes several times. They are moist and full of banana flavor. If you're like me and wind up with a lot of black bananas, they are a welcome alternative to banana bread. I've played around with various frostings and found that some work better with banana than others. Here are three I like best.


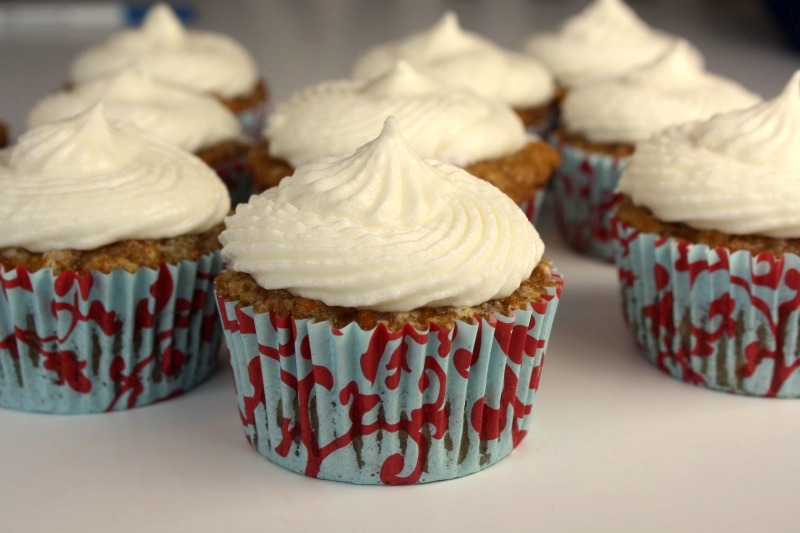
Since the cupcakes are quite sweet, I think they are best with a frosting that's not too sweet. One great alternative is a classic cream cheese frosting, pictured above.


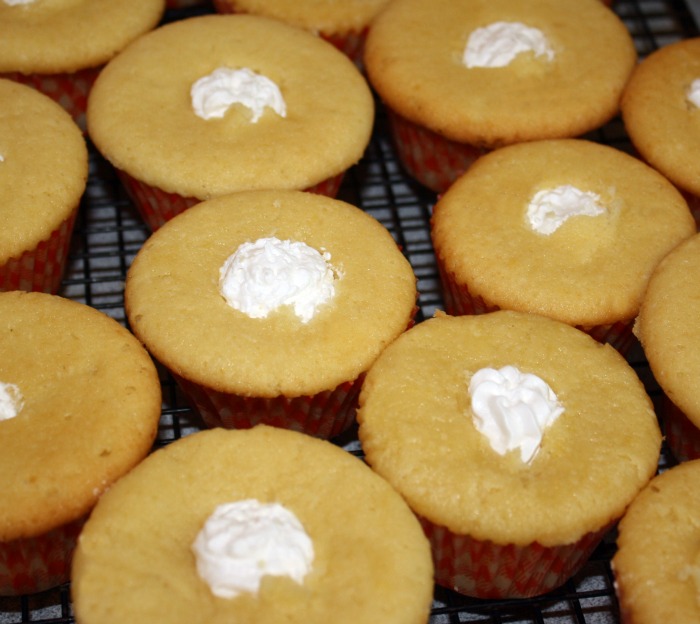
My favorite frosting in terms of taste is caramel frosting. The drawback, though, is that it's hard to make the frosting look pretty. Because it's cooked, you need to let it cool to just the temperature to be able to pipe it. Too warm and it will not hold its shape; too cool and it will be too stiff to flow through the piping bag. I managed to pipe the frosting in the top photo. I added a little dollop of chocolate ganache in the middle. It didn't look that great, and the chocolate competed with the buttery frosting. I wouldn't do that again.

For the cast cupcakes, above, I just spread the frosting. I should have waited a bit longer for it to cool because it oozed down the sides a bit. I tried to gussy them up with some sparkly sugar and a candy pea (because the play was a spoof on The Princess and the Pea). They didn't look terrific but they sure were delicious.


I also tried to make a vanilla buttercream with chocolate swirled in it. The effect wasn't as attractive as I had hoped, and I thought it was too sweet to be paired with the banana cupcakes. The cast enjoyed them, though, so I included the recipe below.

I got the cupcake recipe from a food blogger named Evan, who also made these cupcakes with three frostings, but three that were completely different from mine -- Honey-Cinnamon Buttercream, and Peanut Butter Buttercream. So if you want to try those, go to her post.

Large Batch Banana Cupcakes
Adapted from Hello Cupcakes! by Karen Tack and Alan Richardson. I found the recipe on this blog post.

Makes 36 standard cupcakes (or 30 regular and a bunch of minis)

3 1/3 cups (417 grams) all-purpose flour
2 tsp baking powder
1 tsp baking soda
1/2 tsp salt (I used ¼ tsp because I only had salted butter on hand)
6 medium ripe bananas
2/3 cup buttermilk
2 sticks (1 cup) butter, softened
2 1/2 cups (500 grams) sugar
4 large eggs
2 tsp vanilla extract

Preheat oven to 350 degrees.

You'll need three good-size mixing bowls. In one, whisk together flour, baking powder, baking soda and salt. In the second bowl, mash bananas and buttermilk.

In your third bowl – the stand mixer bowl, if you’re using one -- beat butter and sugar until fluffy. (If you don’t have soft butter, just let the stand mixer do its thing until the butter is room temperature.) Add the eggs, one at a time.

Add the flour mixture, alternating with the with the banana mixture in batches, beginning and ending with the flour mixture. Stir in vanilla.

Spoon batter into paper lined muffin tins. If you happen to have Pampered Chef scoops, I used the large for the regular cupcakes, and the smallest for the mini cupcakes. Pop the pans into the oven.

Bake until light golden brown on top and a toothpick comes out with a couple of crumbs. My mini cupcakes took about 15 minutes to bake. The regular cupcakes took about 20 minutes.

Classic Cream Cheese Frosting

1 8-ounce package of regular cream cheese (I think this works best if it's somewhat cool)
1/2 cup (1 stick) butter, softened
1 teaspoon vanilla
2 cups powdered sugar

Blend together cream cheese and butter. With mixer on low speed, add the vanilla, then gradually add the powdered sugar until completely incorporated.

This frosts about 2 dozen cupcakes. I used a large star tip to pipe the frosting.

Caramel Frosting (I've also seen this called brown sugar frosting.)
This frosts about a dozen cupcakes, so you’ll need to double (at least) to frost a large batch.

6 Tablespoons butter
3/4 cup brown sugar, packed (I prefer dark but light works fine)
6 Tablespoons milk
1 teaspoon vanilla extract
2 cups (250 grams) powdered sugar

Melt the butter in a saucepan. Add the sugar and the milk. Bring to a boil and continue to boil for 1 minute (it's in bold because I often forget this part). Remove from the heat, add the vanilla and gradually mix in the powdered sugar. Let cool until slightly thickened. If you want to pipe it, you'll have to keep checking until it's at the point where it holds its shape but isn't too stiff. It's easier just to spread.

Swirled Vanilla and Chocolate Buttercream Icing
My own concoction. Use this with the banana cupcakes only if you like things really sweet.

2 1/2 ounces (or so) bittersweet chocolate chips
3 cups (375 g) confectioners' sugar
1 cup (2 sticks) softened butter
1 teaspoon vanilla extract
1 to 2 tablespoons whipping cream (I sometimes go up to 3)

Melt chocolate chips in microwave in 30-second increments. Let cool while you make the vanilla icing.

In a standing mixer fitted with a whisk attachment, mix together sugar and butter. Mix on low speed until well blended and then increase speed to medium and beat for another 3 minutes.

Add vanilla and cream. Continue to beat on medium speed for 1 minute more, adding more cream if needed for desired consistency.

Mix one cup of the frosting with the melted chocolate chips. Using a long icing spatula, make a stripe of chocolate icing down one side of a pastry bag. Fill the rest with the vanilla buttercream. When you pipe the frosting (I used a star tip), it will swirl.

Frosts 24 cupcakes with a generous amount of frosting.